Trending searches
Popular collections
Popular products
Cart ($0)
Cart ($0)



The calibration of the first layer takes place by calibrating the distance between the tip of the nozzle and the surface of the printing plate; in this way the extruded plastic will stick correctly to the plane, being crushed slightly and correctly.
Longer 3D printers are equipped with a menu accessible from a display that allows you to calibrate accurately and precisely, by measuring it at 5 predetermined points. For calibration it is enough to leave the space of a sheet of paper between the tip of the nozzle and the surface of the plate, so that the sheet can move freely but with a slight friction, simply by turning each of the 4 knobs to manually adjust the distance between the nozzle and the plane.
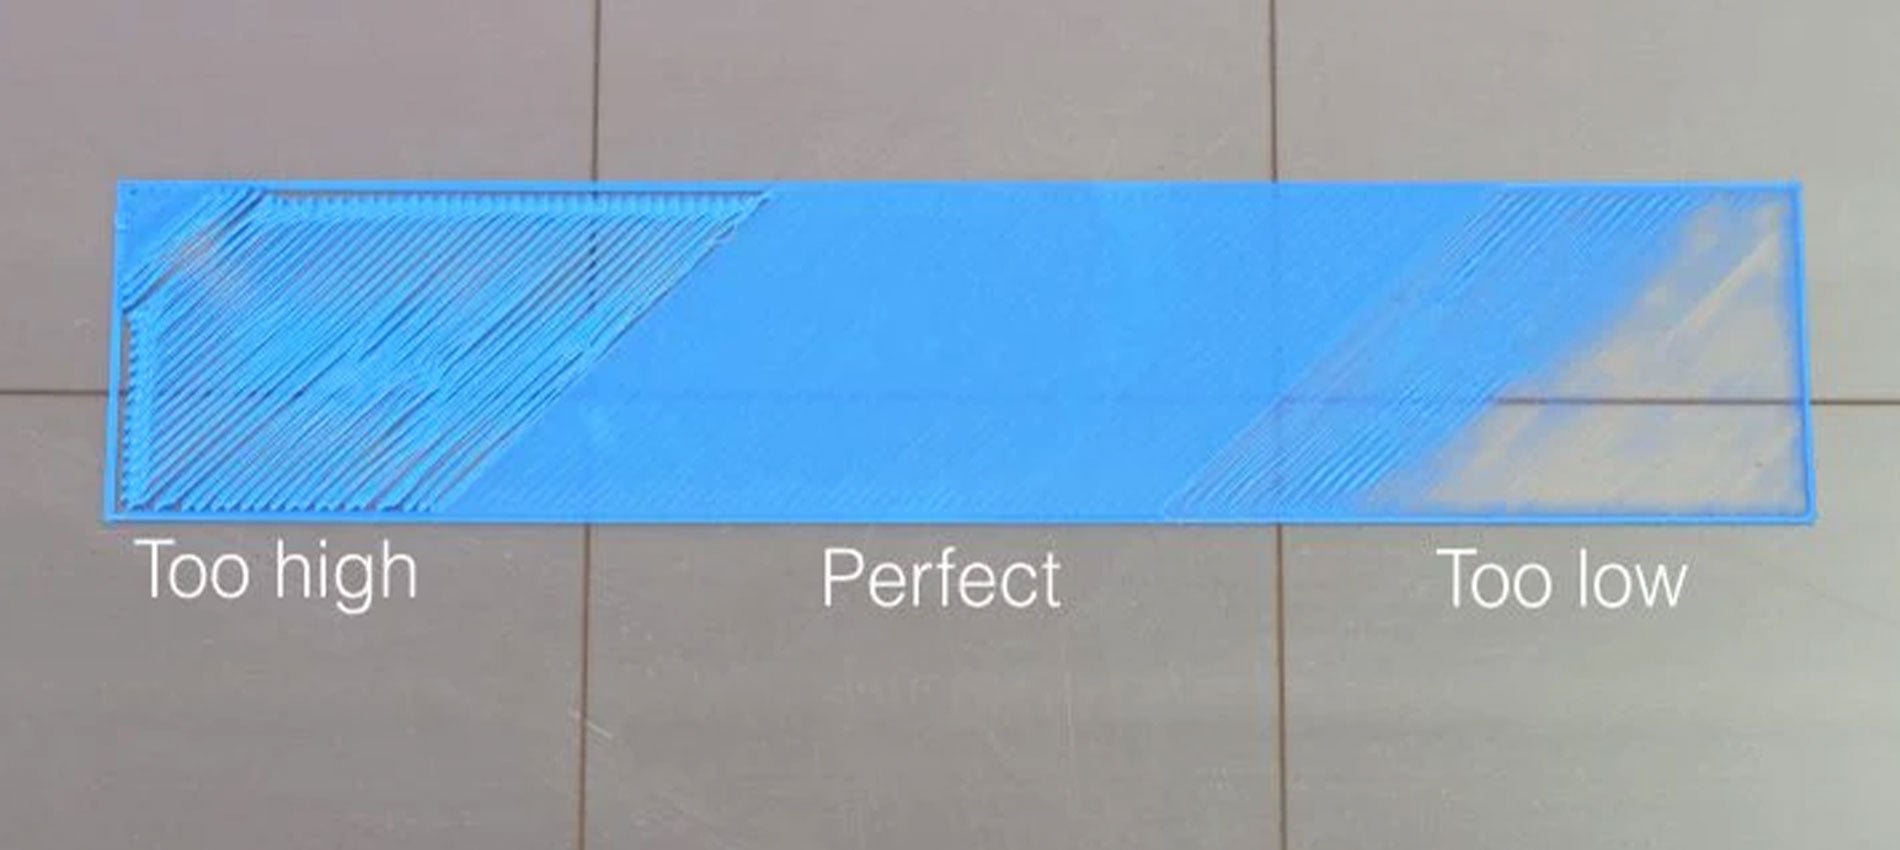
Once the calibration has been carried out correctly, it is possible to make a test print to evaluate the quality of the first layer, which will be perfect if the calibration has been carried out correctly or of poor quality if the calibration has been carried out incorrectly. Proper adjustment ensures a uniform and perfect surface, without gaps between the lines, nor ridges.
An extrusion too far from the printing plane is recognized by round lines instead of crushed, far from each other rather than united; an extrusion too close to the printing plane is recognized by lines crushed completely, too close to each other almost to overlap and create ridges that curl upwards.
In case of incorrect calibration, the following problems may occur: if the nozzle is too far from the print surface, there is a risk that the print will not stick properly, causing a harmful accumulation of material around the nozzle, instead if set too close, an occlusion of the nozzle, excessive adhesion to the printing plate or even permanent damages at the printing plane.
Therefore, it is a good idea not only to accurately calibrate the first layer, several times if necessary, and above all to monitor the printer every time you start a new print until the first layer has been completed correctly.

Sometimes, the first layer may fail to adhere to the print plane despite the calibration being done correctly. In these cases, you can proceed with the thorough cleaning of the printing surface, so as to remove the accumulated dirt; in case the problem persists, you can proceed with the increase of the flow related to the first layer, a topic that will be covered in a future lesson.
Once a perfect calibration has been obtained, this will not be eternal: the first layer calibration will have to be checked periodically, and surely it will have to be done again every time you move the printer to a different place, you make the nozzle replacement, the extruder change, the replacement of the plane or any other modification to one of the 3 axes.
In some case, it could be found that the calibration is impossible to carry out on the 5 points, that is, the 4 corners of the plane are well calibrated while the center is too close to the tip of the nozzle. This could be caused by incorrect placement of the Z endstop.
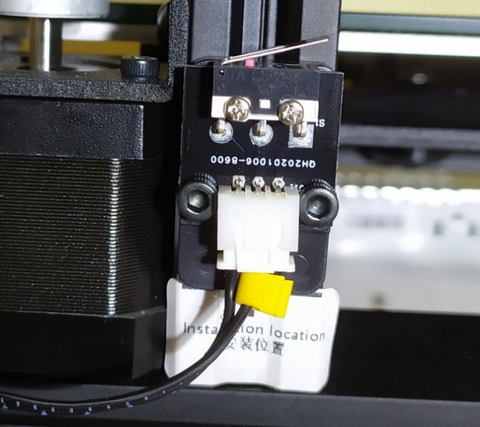
Longer 3D printers have a sticker that indicates where endstop Z should be placed. However, if endstop Z is placed too low, as a result it will be necessary to lower the printing plane as well, screwing more the 4 adjustment knobs; on the other hand, excessively screwing the corners inevitably causes a deformation of the aluminum top, which takes on a curved shape with the highest center of the corners.
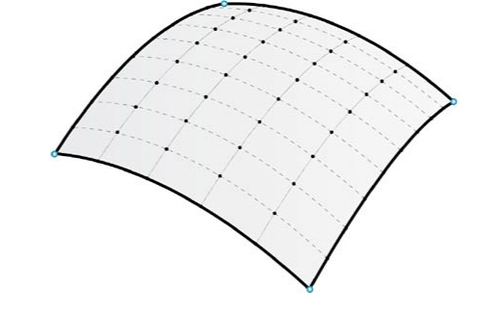
In these cases, it is possible to place endstop Z higher, so as to be able to raise even the 4 corners of the plane and cancel the curvature. On the other hand, it is advisable not to exceed the positioning of endstop Z at the top, as this would cause an instability of the printing plane due to insufficient screwing of the 4 levelling knobs.
Above is the introduction of the first layer calibration, hope it can help you. If you still have any questions during the operation, please visit our Support Page. Our knowledgeable staff is happy to assist you and your team with any questions.
After mastering the above information, why not take a look at our exceptionally outstanding laser engraving machine, the Longer Laser B1 40W ?Unlock the pinnacle of laser engraving and cutting prowess with the B1 40W. Where precision meets versatility and innovation, seize the power to transform your visions into tangible achievements. With its powerful engraving and cutting capabilities, it transcends boundaries to become the best engraving machine and best laser cutter for a variety of materials. From wood, metal, acrylic, glass to leather and more, there are no limits to your creativity.
!
