


Longer Nano Duo
Engrave Like a Master
About Us
With Longer, Make It better


Transform a 3D model into a 2D image

In the processing with Laser Engravers the files with which we work are always two-dimensional, as . png, . svg or other. However, not everyone knows that even 3D models can be processed in 2D.
In fact, using tools integrated in Windows it is possible to easily transform and process a 3D model into a 2D image, thus being able to proceed with laser engraving.
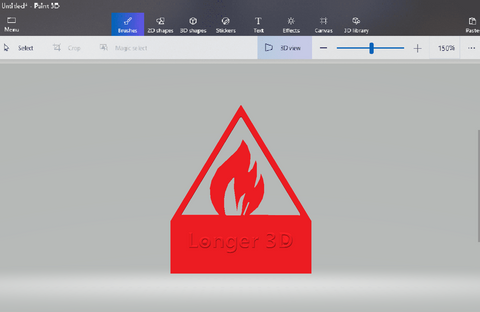
After choosing a 3D model, open the "Paint 3D" software preinstalled in Windows 10 (if it was not present, download it from the Windows Store). Then select to Open the 3D file to import the selected model.
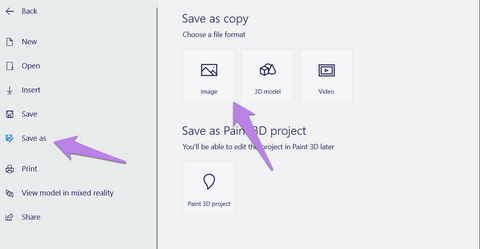
Once the 3D model has been imported into Paint 3D, select "Menu – Save as – Image".
At this point, in the screen that will appear it will be possible to keep the image as it is or change the angle with which you intend to extract the image from the 3D model, pressing on "Adjust Angle & Framing", if necessary; once you have finished changing the angle, confirm or cancel your choice to return to the previous screen.
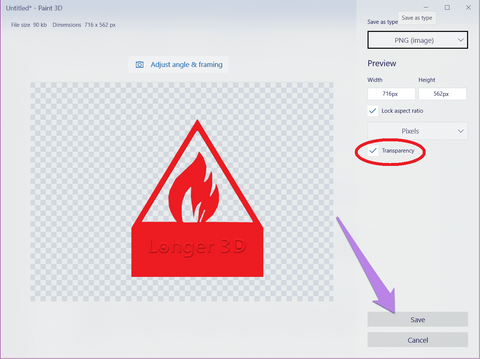
Finally, enable the flag on "Transparency" (absolutely important!) and proceed to save the image as .png file.
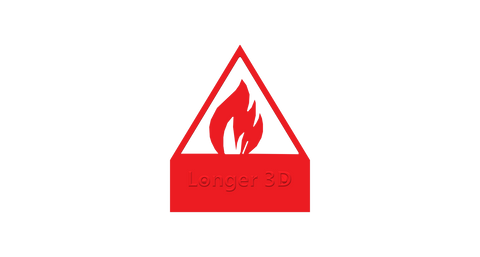
After the 2D image has been successfully exported, you can later open it in your laser engraving software, such as Lasergrbl or Lightburn, to create a .gcode to be engraved.
By following this guide, you can transform almost any 3D model into 2D, as long as it has at least one removable side in two-dimensional form.
https://www.longer3d.com/products/lk5-pro-fdm-3d-printer
- Choosing a selection results in a full page refresh.
Products
Support
Policy
Follow Us
Contact Us
!