Trending searches
Popular collections
Popular products
Cart ($0)
Cart ($0)


ABSTRACT
Welcome to our friendly guide on using the LONGER Nano series engravers with the rotary clamp! Getting the right focus is key to preventing any blurriness or distortion in your engraving patterns. Let’s dive in and explore how to quickly and accurately adjust the focus when using the Nano Pro 12W alongside the rotary clamp.
2) Secure the Material and Level It
Once your software is ready to go, it’s time to use the rotary clamp to hold your material securely. Just be mindful not to over-tighten the clamp or insert it too deeply. The material should rotate smoothly when you turn the clamp. Position your material centrally between the support rollers. To ensure everything is perfectly level, place a level on top of the material and adjust the support height until the bubble is centered. This will help you avoid any distortion in your engraving.
3) Adjust the Focus
Now it’s time to get focused! You can do this using either a ruler or the red laser light.
a) Ruler Focusing
Find the ruler in your rotary clamp accessory package (it’ll look like the one shown below).
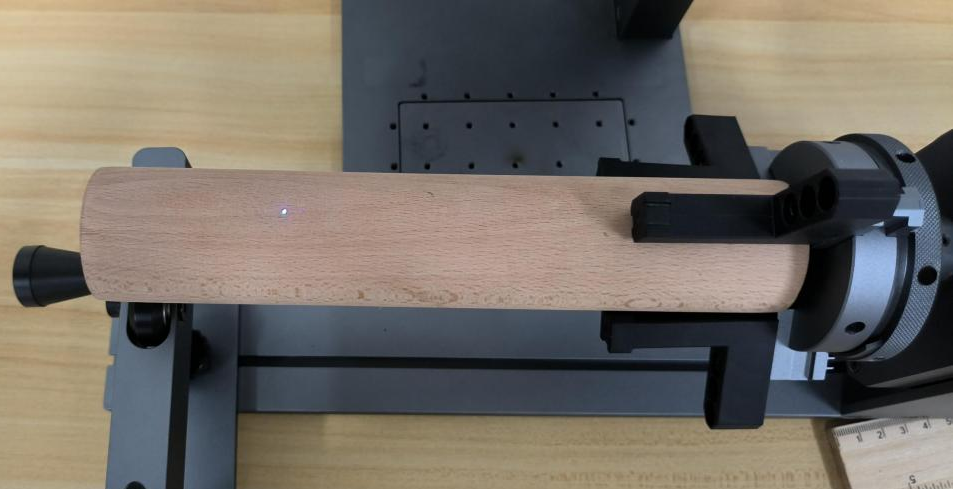
In the LightBurn software, click “Fire” and adjust the rotary clamp until the laser is precisely aligned with the top of the material.
Finally, tweak the lifting platform to ensure the distance from the top of the material to the field lens is 151mm. Voila! You’ve completed the focusing process.
b) Red Laser Focusing
If you prefer using the red laser, head to the top of the machine and press the infrared focus button.
The laser head will emit two red dots. Move the rotary clamp until these red dots fall right on the top of your material.
Adjust the lifting platform until the two red dots overlap, and just like that, you’ve adjusted the focus!
Next, go back to the LightBurn software, click “Fire” again, and move the rotary clamp to ensure the blue laser is hitting the top of your material.
Finally, click “Preview” to confirm your engraving area, then hit “Start” to begin engraving. Don’t forget to wear your protective goggles during the engraving process!
Conclusion
By following these simple steps, you’ll ensure that your engravings with the LONGER Nano Pro 12W are sharp and clear, greatly enhancing the quality of your creative projects. With its powerful features and user-friendly interface, the Nano Pro 12W is here to help you achieve exceptional results across a variety of applications. Happy engraving!
RELATED POSTS
!
