Trending searches
Popular collections
Carro ($0)
Carro ($0)

Introdution:
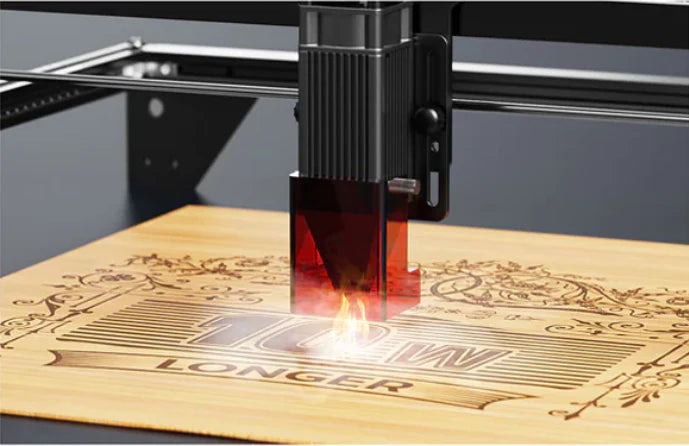
LaserBurn Is a powerful APP designed for LONGER laser engraving machine users, designed for Nano and B1 series laser engraving machines, designed to enhance the user engraving experience and convenience. Both novice and professional, LaserBurn meets the needs of users to control laser engraving machines through mobile phones.
LaserBurn APP Users can directly control their own LONGER laser engraving machine from their smartphones, so what specifically can LaserBurn provide more convenient access and operation for the use of Longer Nano? Let me briefly introduce the steps to use LaserBurn APP:
STEPS
Calibrating Laser
a.Place the machine on a flat table and make sure that the machine is stable and will not shake.
b.Place the wood board to be engraved or cut under the laser
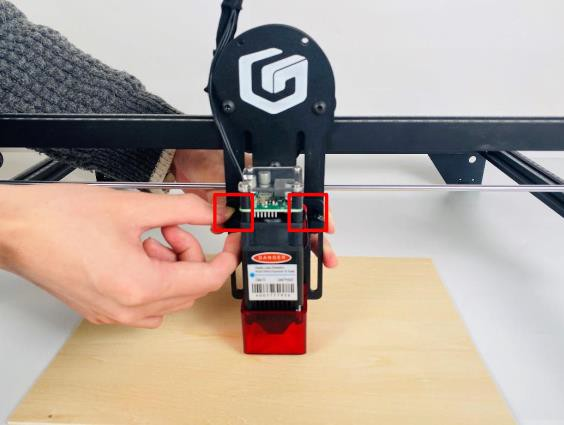
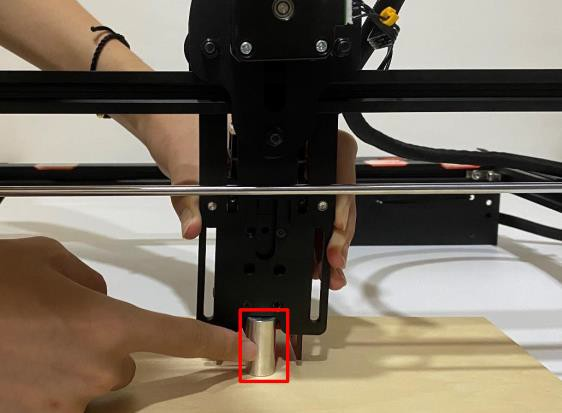
c.Loosen the two thumb screws on the front of laser head by hand. Then place the focusing column vertically on the bottom of the laser head form the rear side, and manually lift the laser head so that the bottom of the rear side of the laser is close to the upper surface of the calibration column.
d.Tihten the two laser thumbscrews, then remove the focusing column
Power Up
a.Find the adapter and power cable and connect them.
b.Connect the power cord to the power supply and connect the other end of the adapter to the power port of the motherboard.
c.Connect the computer and the engraving machine through a USB computer (or insert a Micro SD card).
d.To Turn ON your RAY5 by press the power switch (To Turn OFF your RAY5 by press the power switch once again.)
Touch Screen Operation
RAY5 has a full-color 3.5-inch touch screen with a user-friendly user interface. Engraving and cutting work can be operated with touch screen and SD card.
Wi-Fi Control operation
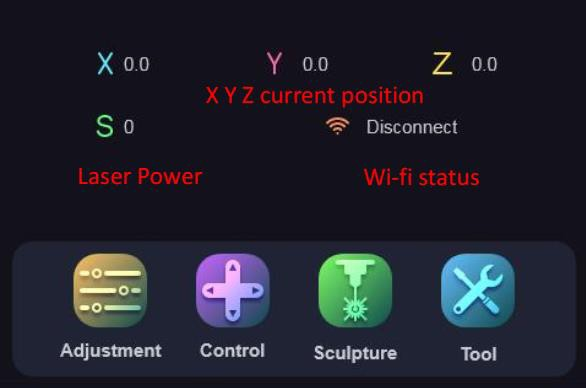
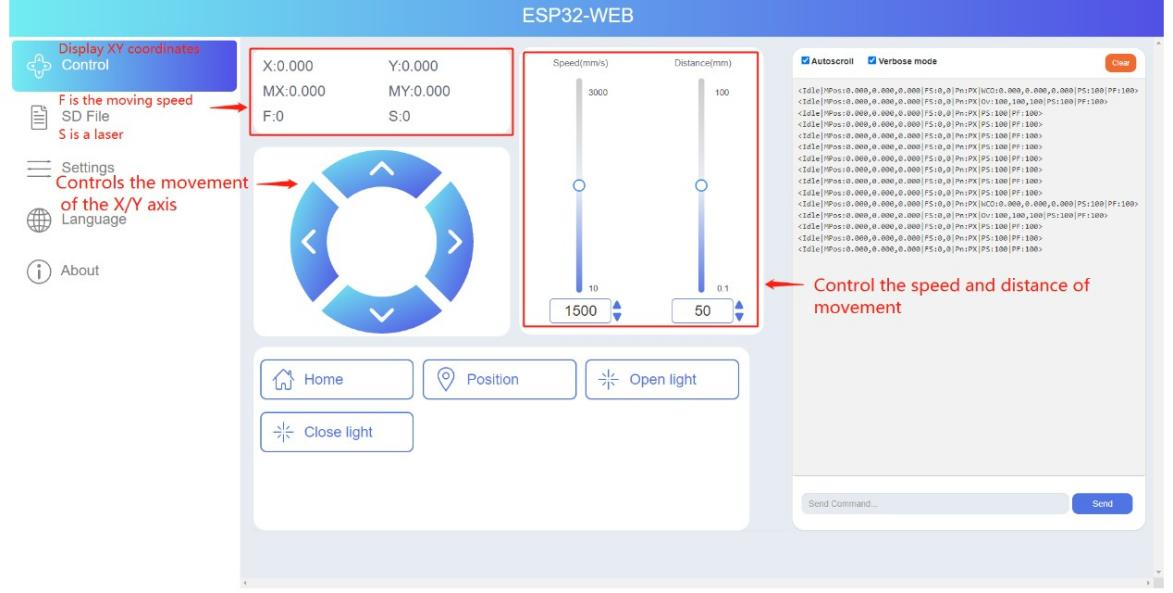
Enter the IP address in the browser of mobile phone or computer, then the control interface will pop up
LaserGRBL Software Operation and Setup
LaserGRBL is an easy-to-use and fully free software for laser engraver only running on Windows.
a.Find LaserGRBL software in attached SD card(path:/software),Or download from the link: https://lasergrbl.com/download/
b.After installing laserGRBL, power up the RAY5, press the power switch button, and connect the laser engraver and computer via USB cable.
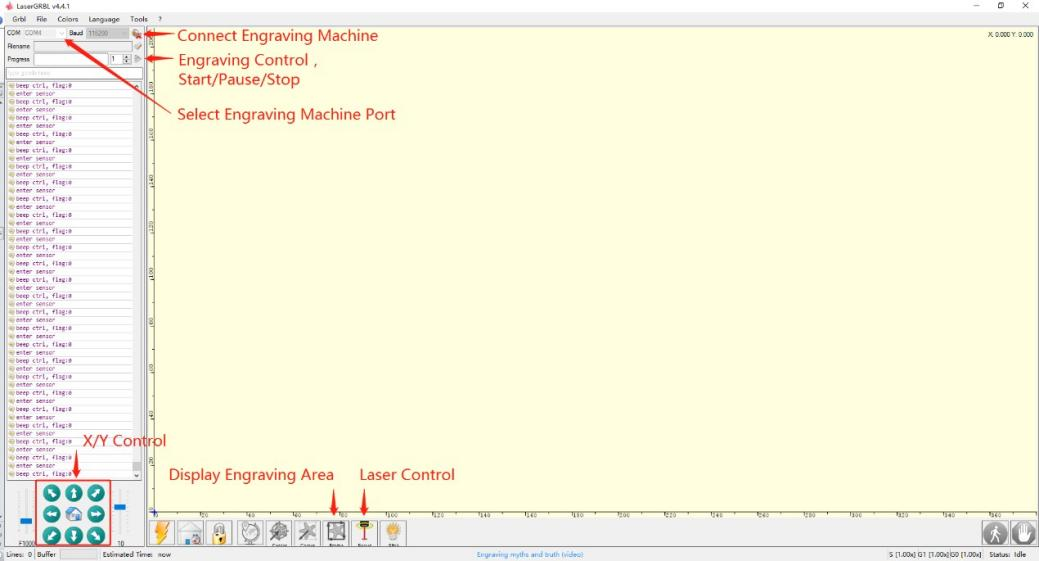
c.Open LaserGRBL, select correct port(depend on your PC), baud rate: 115200. Then click connect button.(If you cannot find correct port, please install CH340 driver manually by click Menu >> Tools >> Install CH340 Driver in LaserGRBL)
Usage
1.Main Interface
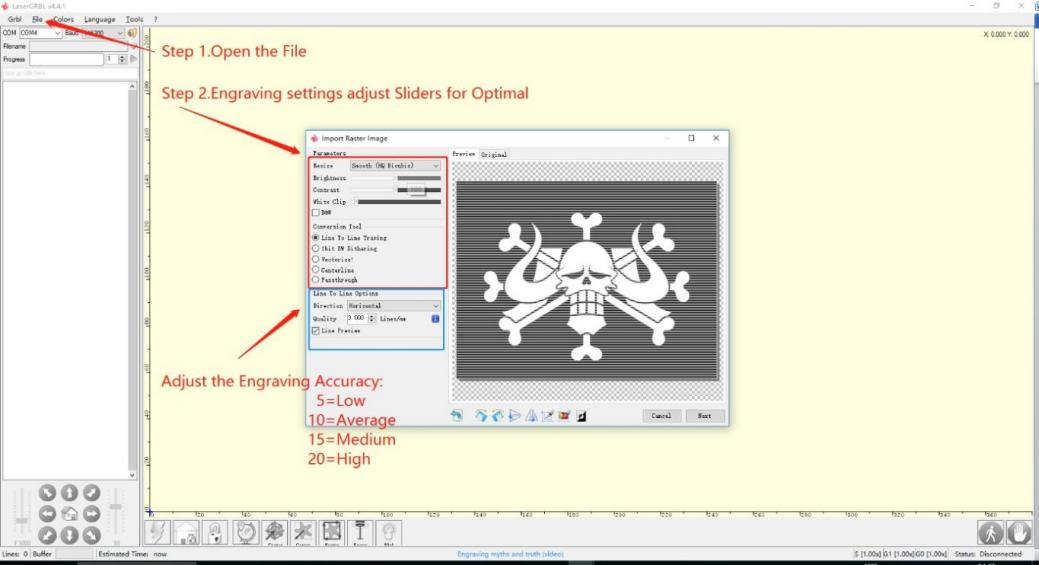
2.Open file and set parameters
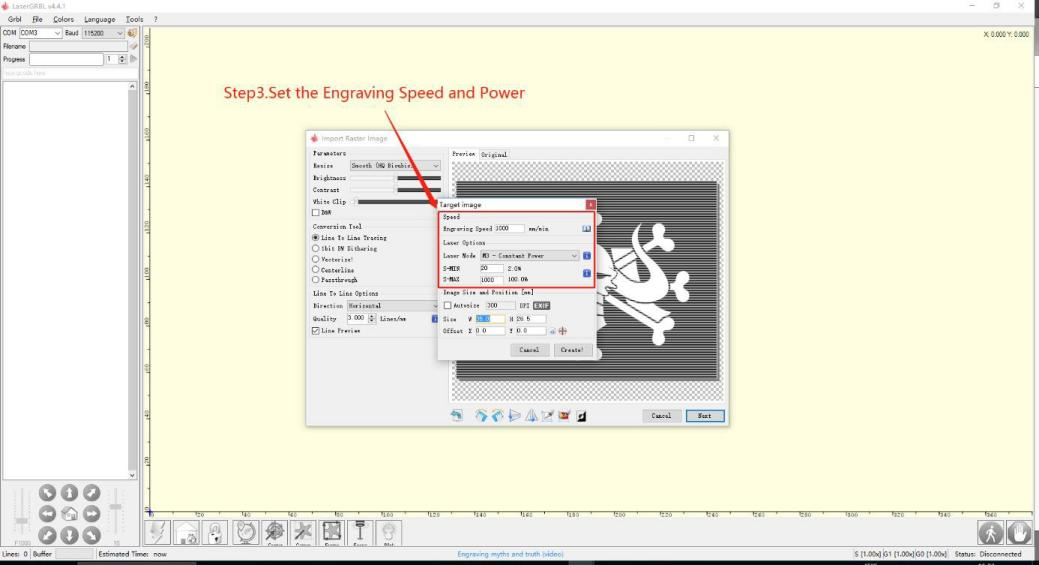
3.Start to engrave
Place a board under the laser, then calibrate the laser.
Move the laser head to the place you want.
Click “Frame” button to check the work frame.
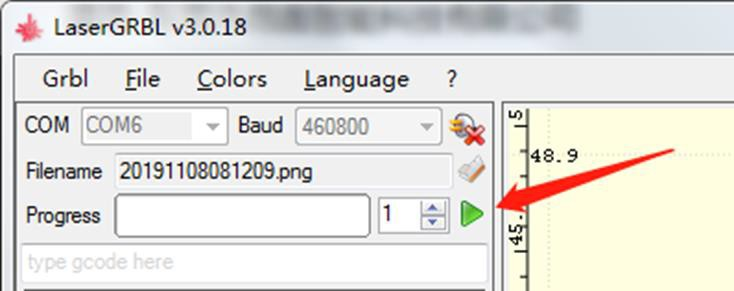
Click button to start engraving.
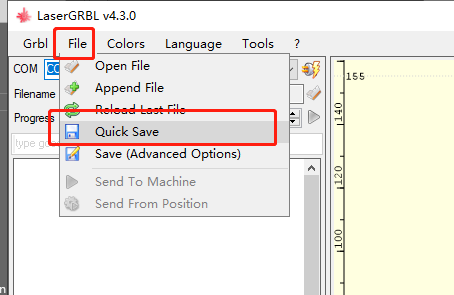
Or you can save gcode file to SD card by click “File” >> “Quick Save” for offline working
More help information about LaserGRBL, please refer to the link: https://lasergrbl.com/usage/
LightBurn Software Operation and setup
LightBurn is a professional software for engraver, a charging software running on Windows, macOS, and Linux. It provides a trial period. You could pay for it afterward if you like it.
a.Find Lightburn software in SD card(path: /software) came with the package. Or just download from
the link:https://lightburnsoftware.com/download/
b.After installing Lightburn, power up the RAY5, press the Power Switch button, and connect the laser engraver and computer via USB cable.
c.For the first time launching LightBurn, it will prompt a “New Device Wizard” for help you setup machine.
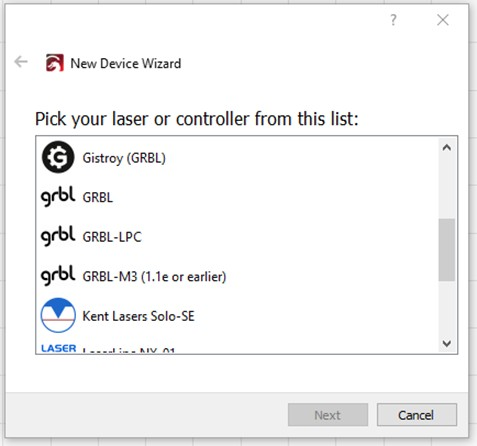
d.Select GRBL form the list, then click “Next” button
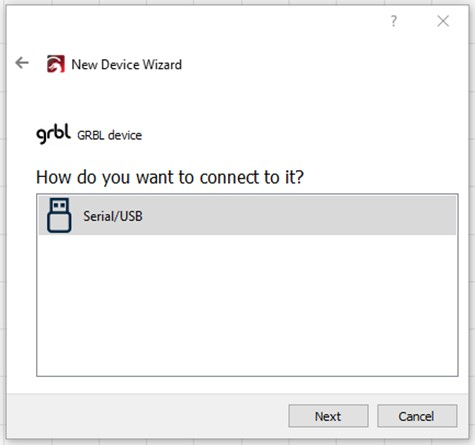
e.Select Serial/USB and press “Next” button.
f.Fill your Device Name, X, Y axis, then click “Enter” button
Name: RAY5
X = 400
Y = 400
g.Select “Front Left” as your Origin X,Y and activate “Auto ‘Home’”, then click “Next” button.
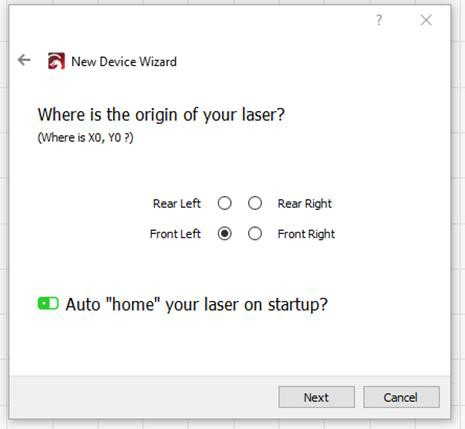
h.Select RAY5 and press Make Default. Your RAY5 is ready to be used in LightBurn software.
Main interface
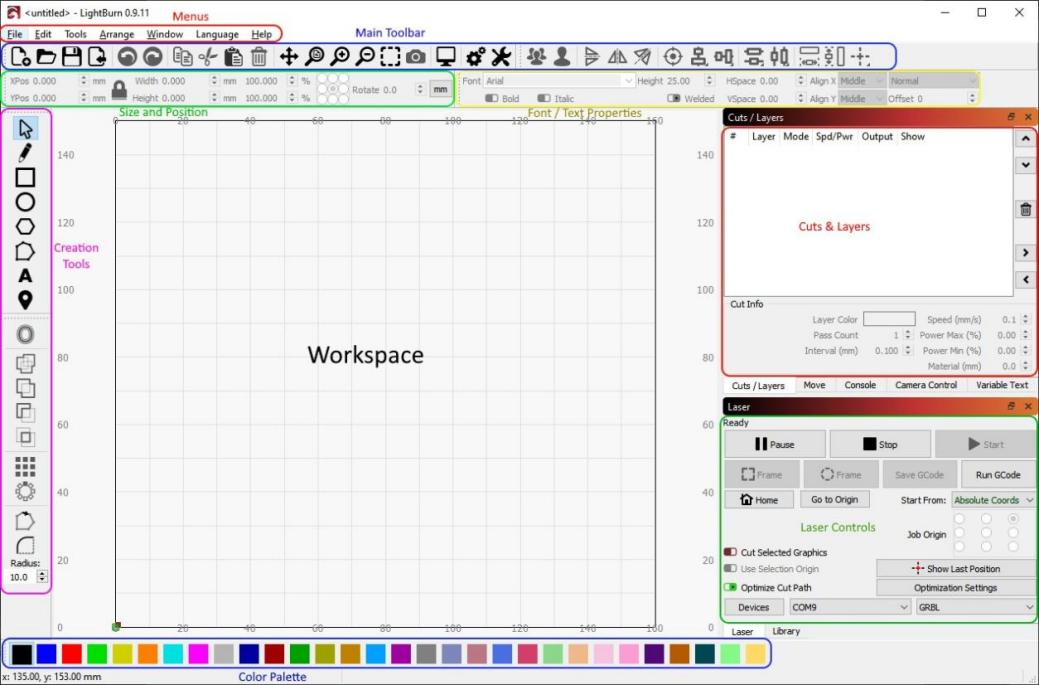
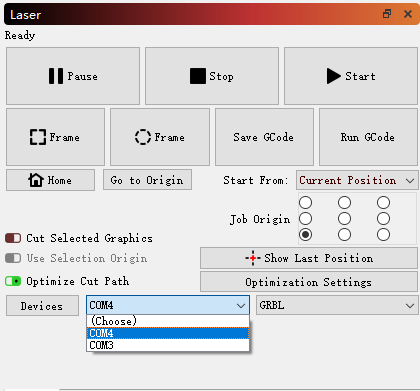
Select correct port(depends on your PC), then the RAY5 is connected to the computer.
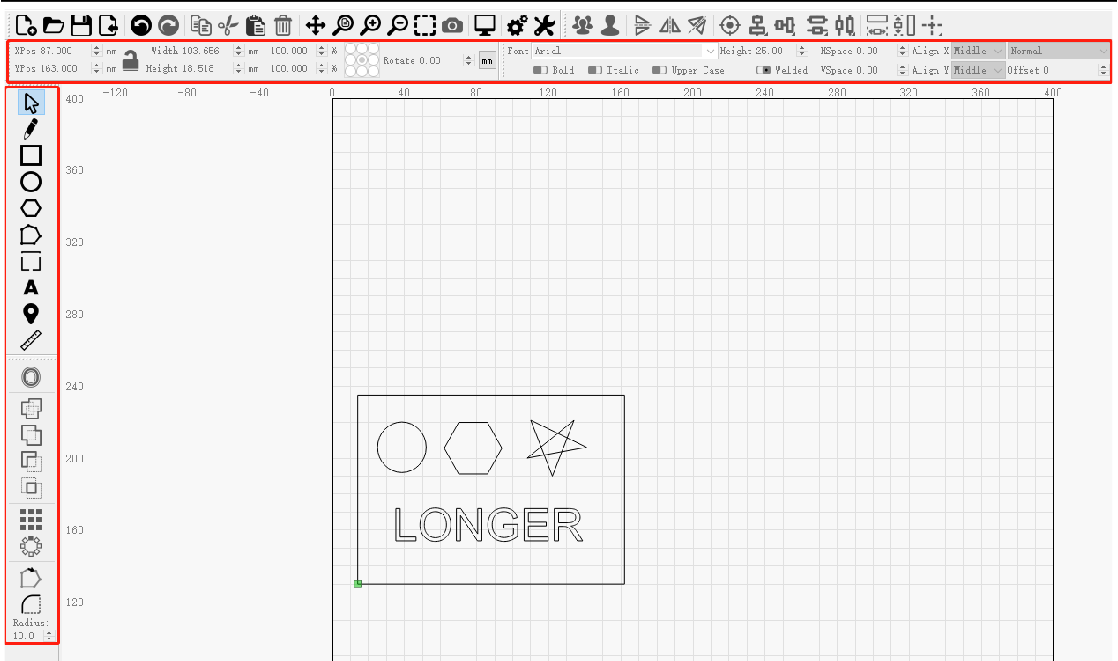
Click Menu “File” >> “Import image from disk.” Or just use draw tool on left column to design your own pattern
Set the name, speed, maximum power, mode, and other parameters in the cutting/layer; (engraving function and cutting function are only different in speed, power. Normally, the cutting speed parameter is slower)
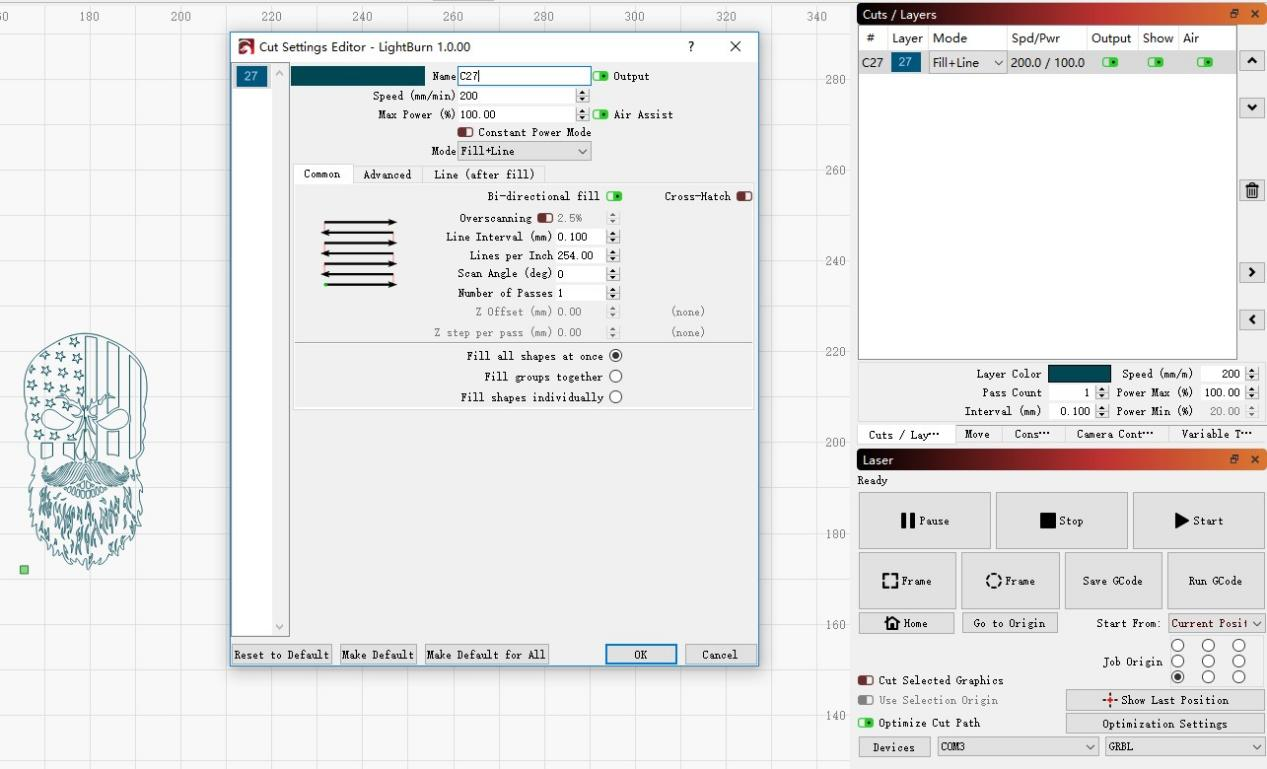
After placing the board under the laser, click Frame to check the laser path whether is completely inside of the board.
Click “Start” to start to work.
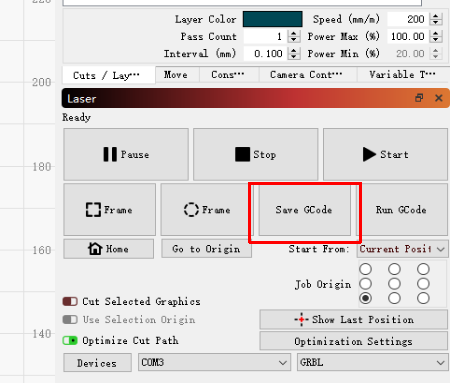
Or you can save gcode file to SD card by click “Save GCode” button in Laser panel for offline working
More help information about lightburn, please refer to the link:
https://lightburnsoftware.com/pages/tutorials
APP Operation
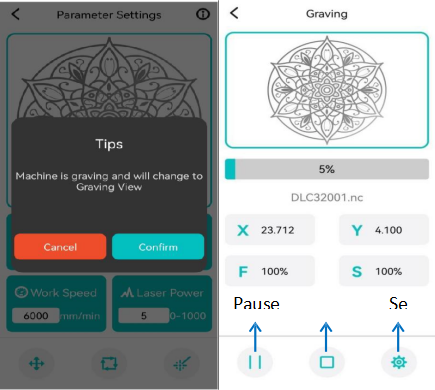
RAY5 can be controlled or engraved through MKSLaser APP when the engraver and APP are connected to the same WIFI.
Please search for "MKSLaser" in Google play or app store or visit the address below to download Android system https://play.google.com/store/apps/details?id=makerbase.com.mks laser
Please search for "MKSLaser" in the app store or visit the address below to download https://apps.apple.com/us/app/mkslaser/id1542756280?uo=4&at= 11l6hc&app=itunes&ct=fnd for Apple system
RELATED POSTS
!
